And even if you are not into scrapbooking or a beginner art journaler, this exercise will still be fun for you.
Today, I would like you to go download this zip: Challenge 04 Download.
It includes 2 vintage photos that were also included in the Pack 05 Member Download. You can use any photos, but for this exercise I feel it is easier with photos of people you do not know.
Choose one of the photos. Look at it. Really look at it. What do you see? People from the past. Ok. Now look deeper. What do you really see? Look into their heads, into their hearts, into their souls. Do you feel it?
Now, start your art journal page. Add some color and texture. Or maybe just some doodles. Remember an art journal page does not have to involve hours of painting and collaging. You can do your pages using just a pack of crayons, or some Dollar Store watercolors.
After you have decided which direction you want to go, start applying the feelings you got from the photo to the page. Did it make you sad? Maybe it reminded you of a poem? Or maybe it evoked feelings that made you want to write your own poetry. Or did it make you think of just one word. Write it down on the page. You don't have to do fancy writing, or even give it a title. Just transfer your feelings from the photo to the page the best way you can. And don't worry. You can keep your page private. It is your journal. You don't have to allow others to read it if you don't want to.
You may have noticed that I did not ask you to actually use the photo on your page. I would like it if you could make this a page without a photo. I know this is where scrapbookers feel the big difference. And if you absolutely can not do this page without a photo, then I would like it if you do not use the photo in the traditional way. Tear it up, paint it over, change it! Just do not apply the photo and then add a pretty frame. This is not a scrapbook. This is an Art Journal.
If you choose to work with one of your own photos, then I suggest you print a copy so you do not destroy the original.
REMEMBER: Art Journaling is not about the beginning or the end. It is all about the process.
Have Fun!
And if you do feel up to it, please share pages at our Flickr gallery HERE
NOTE: This challenge could be done digitally too, but to really get the feel of it, I suggest you do it hands-on. If you don't have an art journal yet, a scrap of paper, a pack of crayons, and some markers will do just fine for this challenge.
SAMPLE:
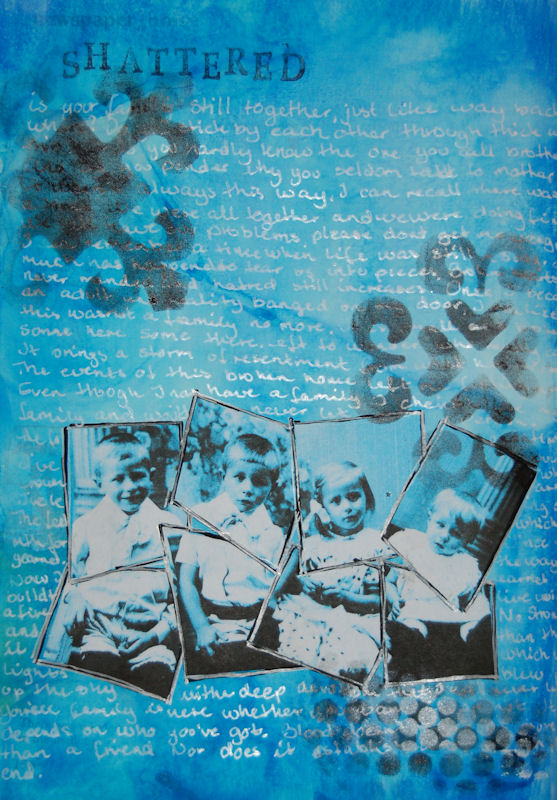
For this one I printed one of the photos from the zip. For some reason everything I print today comes out blue, so instead of fretting over that I decided to make a blue page. I used watercolor to make my background. Just added a lot of color and it became a very streaky. So I sprayed on some more water and used my hair dryer to move the water around until it dried completely.
I cut all the sides off the photo and then cut the photo into 8 pieces. Glued the pieces to the background using Inkssentials Collage glue stick. I drew an edge around the photo pieces first using a Sharpie Poster-paint Pen, and then when that was dry I added a few more lines using a white Sakura Glaze pen.
I then added a title using some cheap letter stamps and dollar store ink.
When everything was dry, I started writing my "feelings" down on the page. I scribbled on purpose. And I made the text rather small cause I had a lot to write and I think that the smaller the text the few people read it. Kinda keeping it private, but not. Also I used a white Sakura Glaze pen. It goes on clear, but dries white, so it is kinda hard to see what you are doing. It takes a few minutes to actually show what you wrote.
Last I used some stencils, sequin waste, and Color Box Cat's Eye pigment to add a little more interest to the page.
The photo, title and the accents are not necessary to make an art journal page. I added the photo because I had chosen to do this page in one of my larger art journals. The pages are quite large and I felt I needed something more to fill my page. I added the title to "explain" what I was trying to show with the photo. In the end I added the accents to help cover up some of the more personal writing.

No comments:
Post a Comment